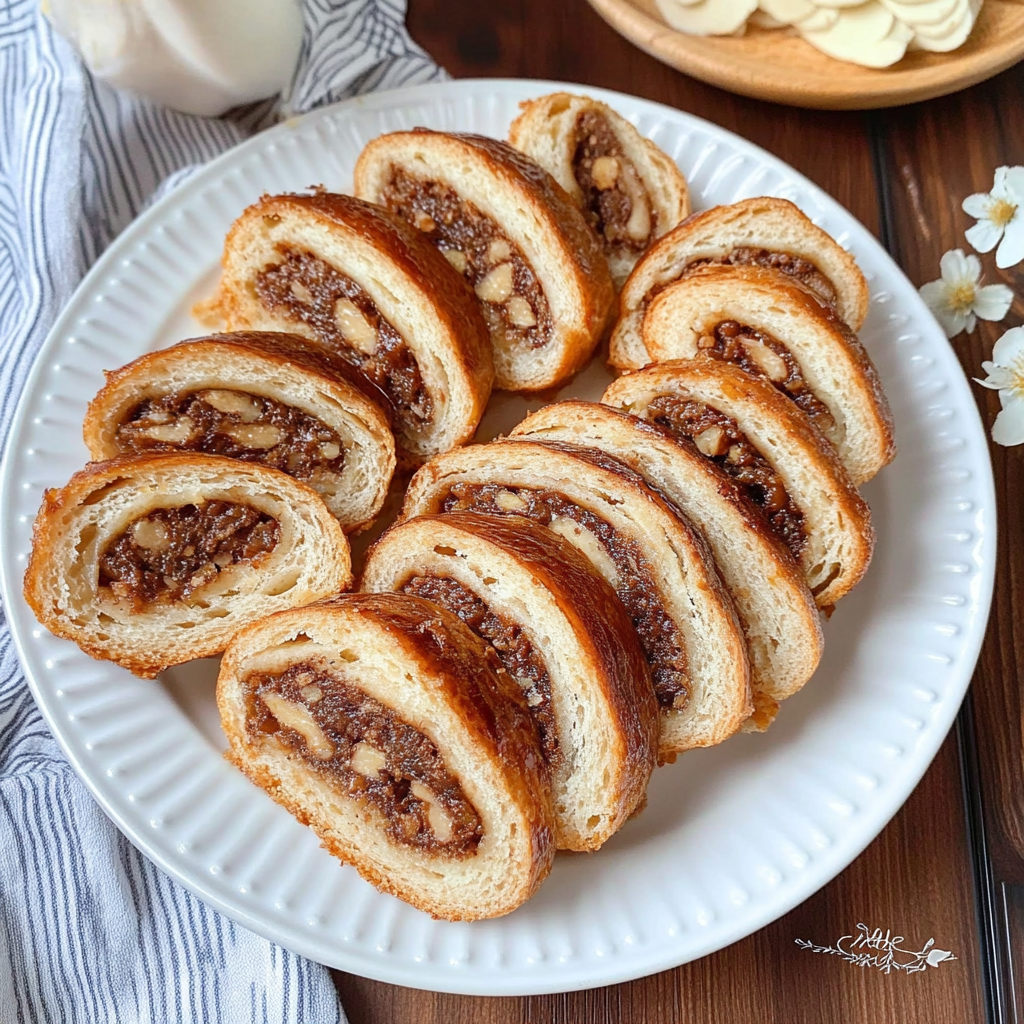
There’s something truly magical about Wallnut Rolls. Imagine biting into a golden-brown pastry, the warmth enveloping your senses while the rich aroma of toasted walnuts dances through the air. Each roll bursts with flavor, promising a delightful crunch and a soft, sweet interior that makes every bite a moment of bliss.

Jump to:
- <strong>Essential Ingredients</strong>
- <strong>How to Make Wallnut Rolls</strong>
- <strong>Perfecting the Cooking Process</strong>
- <strong>Add Your Touch</strong>
- <strong>Storing & Reheating</strong>
- <strong>FAQ</strong>
- What type of walnuts should I use for Wallnut Rolls?
- Can I make Wallnut Rolls ahead of time?
- How do I know when my Wallnut Rolls are done baking?
- Can I substitute other nuts in this recipe?
- <strong>Conclusion for Wallnut Rolls</strong>
- 📖 Recipe Card
I remember the first time I made these Wallnut Rolls for my family. As the oven timer chimed, the kitchen filled with an intoxicating scent that had everyone peeking in, eager to taste what I’d conjured up. From that day on, these delicious rolls became a must-have for family gatherings and celebrations.
Why You'll Love This Wallnut Rolls
- This incredible Wallnut Rolls transforms simple everyday ingredients into restaurant-quality flavors that will blow your mind completely.
- Foolproof recipe techniques guarantee perfect results every single time, making even novice cooks feel like professional chefs instantly.
- Stunning visual appeal with gorgeous colors and mouthwatering aromas creates the ultimate Instagram-worthy dish for any special occasion.
- Endlessly adaptable for different dietary needs while working beautifully for meal prep, date nights, or entertaining large groups effortlessly.
The laughter and joy they bring to my kitchen make these Wallnut Rolls incredibly special—trust me; you’ll want to share them too!
Essential Ingredients
Here’s what you’ll need to make this delicious dish:
-
All-Purpose Flour: The backbone of your dough; choose high-quality flour for best results.
-
Active Dry Yeast: Fresh yeast is key here; ensure it’s active to help your rolls rise beautifully.
-
Warm Milk: Warm, not hot! It helps activate the yeast without scalding it.
-
Sugar: A touch of sweetness enhances flavor; I prefer using granulated sugar for consistency.
-
Salt: Enhances all flavors—don’t skip this! Use fine salt for even distribution.
-
Butter: Use unsalted butter for better control over your dish’s saltiness; melt it slightly before adding.
-
Chopped Walnuts: Toast them lightly to bring out their nutty goodness; freshly chopped walnuts are best.
-
Cinnamon Powder: Adds warmth and depth; adjust according to your taste preference.
-
Eggs: Essential for richness; I recommend using large eggs at room temperature.
-
Vanilla Extract: Pure vanilla elevates flavors; avoid imitation for a more authentic taste.
The full ingredients list, including measurements, is provided in the recipe card directly below.
How to Make Wallnut Rolls
Prepare the Dough: In a large bowl, combine warm milk and yeast. Let it sit until frothy—this usually takes about 5 minutes. Then add sugar, melted butter, eggs, and salt.
Add Flour: Gradually mix in all-purpose flour until you form a soft dough. Knead on a floured surface for about 8 minutes until smooth and elastic.
Let It Rise: Place the dough in a greased bowl and cover with a damp cloth. Allow it to rise in a warm place until doubled in size—this can take about an hour.
Create the Filling: While waiting, mix together chopped walnuts, sugar, cinnamon powder, and vanilla extract in a bowl. The aroma will make you giddy!
Shape Your Rolls: Once risen, roll out the dough into a rectangle about 1/4-inch thick. Spread walnut filling evenly across and roll tightly from one end to another.
Slice and Arrange: Cut rolled dough into 1-inch slices. Place them on a greased baking sheet with enough space between each roll to expand during baking.
Bake to Perfection: Preheat your oven to 350°F (175°C). Bake rolls for 20-25 minutes or until golden brown—a lovely smell will fill your home by then!
These delightful Wallnut Rolls are not just food; they are an experience waiting to unfold in your kitchen! Enjoy each step as you create them with love and laughter.
You Must Know About Wallnut Rolls
- This showstopping Wallnut Rolls delivers restaurant-quality results using simple ingredients you probably already have at home.
- The perfect balance of textures and flavors creates an unforgettable dining experience that will have everyone asking for seconds.
- Picture-perfect presentation with vibrant colors makes this dish absolutely Instagram-worthy and guaranteed to impress any dinner guest.
- Incredibly versatile recipe that works beautifully for weeknight dinners, meal prep, special occasions, or even outdoor entertaining sessions.
Perfecting the Cooking Process
To make the best Wallnut Rolls, begin by preparing your dough and letting it rise while you create the walnut filling. Once the filling is ready, roll out the dough and spread the mixture evenly. Finally, shape the rolls and let them rise again before baking until golden brown. This sequence ensures each layer develops flavor and texture.
Add Your Touch
Feel free to customize your Wallnut Rolls by swapping walnuts for pecans or adding a sprinkle of cinnamon for warmth. You can also experiment with different fillings like chocolate or dried fruits to elevate the flavor profile. Personalizing these rolls transforms them into a unique dish that reflects your taste.
Storing & Reheating
Store leftover Wallnut Rolls in an airtight container at room temperature for up to three days or refrigerate for longer freshness. To reheat, wrap them in foil and warm in the oven at 350°F for about 10 minutes, ensuring they stay soft and delicious without drying out.
Chef's Helpful Tips for Wallnut Rolls
- This professional-quality Wallnut Rolls relies on precise timing and temperature control to achieve restaurant-standard results consistently.
- Master the art of mise en place by prepping all ingredients beforehand, ensuring smooth execution and preventing any last-minute cooking disasters.
- The secret lies in layering flavors throughout the cooking process rather than seasoning only at the end for maximum depth.
- Tip let the finished dish rest for optimal texture and flavor development before serving to hungry guests waiting eagerly.
Sharing my first experience making Wallnut Rolls reminds me of how nervous I was; my family had never been so quiet while waiting for something to bake! Their delighted faces when they tried them made it all worthwhile.
FAQ
What type of walnuts should I use for Wallnut Rolls?
Using fresh, unsalted walnuts gives the best flavor in your Wallnut Rolls. You can toast them lightly to enhance their nutty aroma before adding them to your filling mixture. Avoid using stale or overly processed nuts as they can compromise the overall taste.
Can I make Wallnut Rolls ahead of time?
Absolutely! You can prepare your dough, fill it, shape it into rolls, then freeze them before the final rise. When you’re ready to bake, just let them thaw in the fridge overnight before allowing them to rise again at room temperature before baking.
How do I know when my Wallnut Rolls are done baking?
Your Wallnut Rolls are perfectly baked when they turn golden brown on top and sound hollow when tapped on the bottom. An internal temperature of about 190°F will indicate they are fully cooked through—use a kitchen thermometer if you want precise results!
Can I substitute other nuts in this recipe?
Yes! You can use hazelnuts or almonds instead of walnuts, but be aware that each nut has its own distinct flavor profile that will slightly alter the taste of your rolls. Experimenting with different nuts is a fun way to discover new favorites!
Conclusion for Wallnut Rolls
In conclusion, mastering Wallnut Rolls is all about understanding cooking techniques and personalizing flavors to suit your taste buds. Follow key steps like proper rising times, ingredient swaps, and smart storage practices to ensure delightful results every time you bake these scrumptious rolls. Whether enjoyed fresh from the oven or as leftovers days later, they promise comfort and joy with each bite!
Did You Enjoy Making This Recipe? Please rate this recipe with ⭐⭐⭐⭐⭐ or leave a comment.
📖 Recipe Card
Print
Wallnut Rolls
- Total Time: 45 minutes
- Yield: Makes approximately 12 rolls 1x
Description
Wallnut Rolls are a delightful treat that combines the rich, nutty flavor of toasted walnuts with a soft, sweet dough. These golden-brown pastries are perfect for any occasion, promising a crunchy exterior and tender interior that will melt in your mouth. Whether for family gatherings or special celebrations, these rolls are sure to impress and become a beloved favorite.
Ingredients
- 4 cups all-purpose flour
- 2 1/4 tsp active dry yeast (1 packet)
- 1 cup warm milk (110°F)
- 1/2 cup granulated sugar
- 1 tsp salt
- 1/2 cup unsalted butter, melted
- 3 large eggs, at room temperature
- 1 1/2 cups chopped walnuts, toasted
- 2 tsp cinnamon powder
- 2 tsp vanilla extract
Instructions
- In a large bowl, combine warm milk and yeast. Let sit for about 5 minutes until frothy.
- Stir in sugar, melted butter, eggs, and salt until well combined.
- Gradually add flour until a soft dough forms. Knead on a floured surface for about 8 minutes.
- Place the dough in a greased bowl, cover with a damp cloth, and let rise in a warm area until doubled in size (about 1 hour).
- For the filling, mix chopped walnuts with sugar, cinnamon, and vanilla extract.
- Roll out the dough into a rectangle (about 1/4-inch thick). Spread the walnut filling evenly and roll tightly.
- Cut into 1-inch slices and place on a greased baking sheet. Allow to rise again for about 30 minutes.
- Preheat oven to 350°F (175°C) and bake for 20-25 minutes or until golden brown.
- Prep Time: 20 minutes
- Cook Time: 25 minutes
- Category: Dessert
- Method: Baking
- Cuisine: American
Nutrition
- Serving Size: 1 roll (75g)
- Calories: 210
- Sugar: 8g
- Sodium: 120mg
- Fat: 9g
- Saturated Fat: 4g
- Unsaturated Fat: 5g
- Trans Fat: 0g
- Carbohydrates: 30g
- Fiber: 2g
- Protein: 5g
- Cholesterol: 35mg


