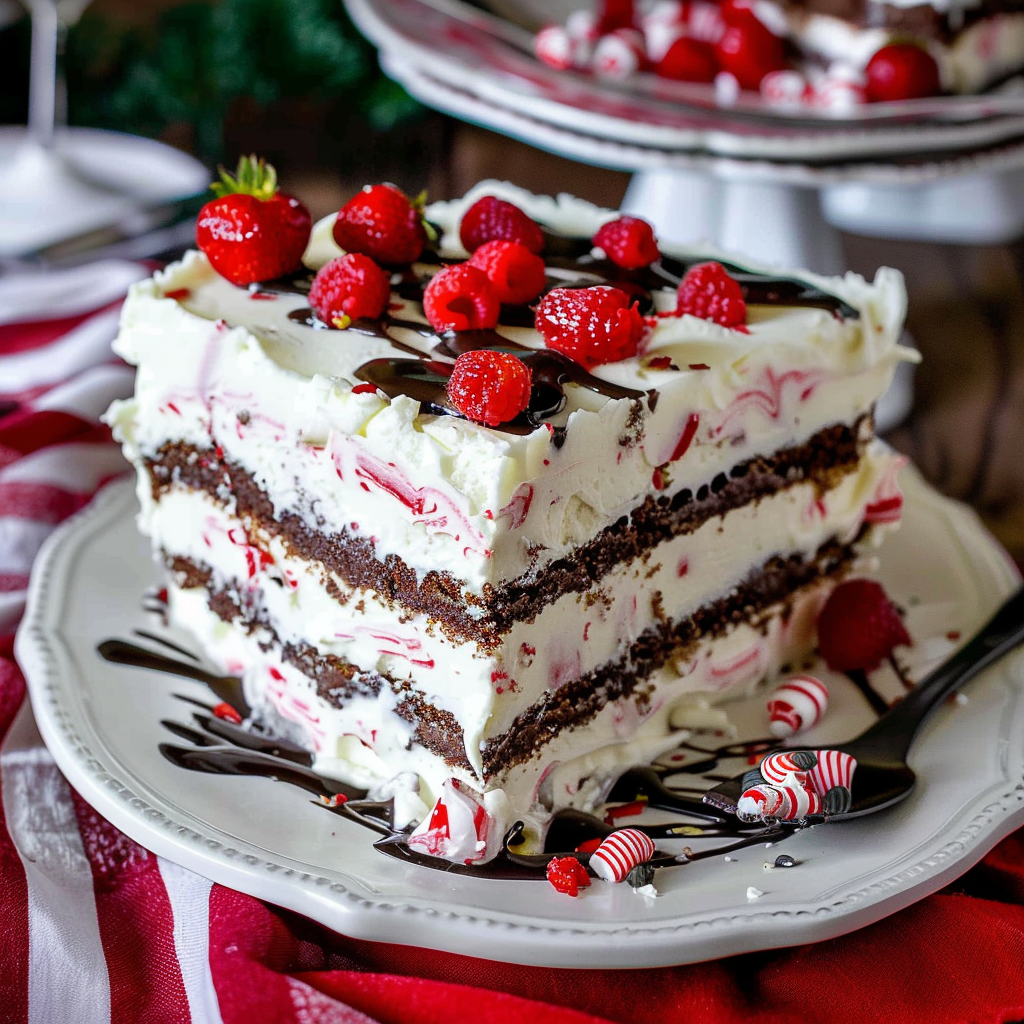
Peppermint Icebox Cake is like a festive hug for your taste buds. Imagine layers of creamy peppermint filling nestled between crunchy chocolate wafers, creating a symphony of flavors that dances on your palate. As you dive in, the coolness of the peppermint mingles with the rich chocolate, making every bite an exhilarating experience that transports you to a winter wonderland.

Jump to:
- <strong>Essential Ingredients</strong>
- <strong>How to Make Peppermint Icebox Cake</strong>
- <strong>Perfecting the Cooking Process</strong>
- <strong>Add Your Touch</strong>
- <strong>Storing & Reheating</strong>
- <strong>FAQ</strong>
- What is Peppermint Icebox Cake?
- How long does Peppermint Icebox Cake need to chill?
- Can I make this cake gluten-free?
- How can I decorate my Peppermint Icebox Cake?
- <strong>Conclusion for Peppermint Icebox Cake</strong>
- 📖 Recipe Card
This delightful dessert is perfect for holiday gatherings, summer barbecues, or just because you deserve a sweet treat. I remember the first time I made Peppermint Icebox Cake; my friends were convinced I had some secret culinary magic. The truth? It was all about this easy recipe! Get ready to indulge in a dessert that is as enjoyable to make as it is to eat.
Why You'll Love This Peppermint Icebox Cake
- This incredible Peppermint Icebox Cake transforms simple everyday ingredients into restaurant-quality flavors that will blow your mind completely.
- Foolproof recipe techniques guarantee perfect results every single time, making even novice cooks feel like professional chefs instantly.
- Stunning visual appeal with gorgeous colors and mouthwatering aromas creates the ultimate Instagram-worthy dish for any special occasion.
- Endlessly adaptable for different dietary needs while working beautifully for meal prep, date nights, or entertaining large groups effortlessly.
I still chuckle when I think about how my cousins couldn’t stop raving about it at last year’s holiday gathering; their eyes lit up like Christmas lights!
Essential Ingredients
Here’s what you’ll need to make this delicious dish:
-
Chocolate Wafer Cookies: These are the foundation of your cake, providing the perfect crunch and chocolatey goodness.
-
Heavy Whipping Cream: Use cold cream for whipping; it creates a light and fluffy texture that’s irresistible.
-
Powdered Sugar: This sweetener adds just the right amount of sweetness without any gritty texture.
-
Peppermint Extract: A little goes a long way, so choose pure extract for authentic flavor.
-
Crushed Candy Canes: They not only add crunch but also give your cake that festive touch.
The full ingredients list, including measurements, is provided in the recipe card directly below.
How to Make Peppermint Icebox Cake
Prepare Your Ingredients: Start by gathering all your ingredients and tools; having everything in place makes the cooking process seamless and fun.
Whip Your Cream: In a large mixing bowl, pour in the heavy whipping cream. Beat it with an electric mixer on medium speed until soft peaks form—aim for fluffy clouds of deliciousness.
Add Sweetness and Flavor: Gradually mix in powdered sugar and peppermint extract. Continue beating until stiff peaks form; your mixture should hold its shape like a well-behaved meringue.
Layer Your Cake: Begin layering by dipping each chocolate wafer cookie briefly in milk (just enough to soften). Place them in a rectangular dish, then spread a layer of whipped cream on top. Repeat until you run out of cookies or patience!
Add The Final Touches: Once layered, top your cake with any leftover whipped cream and sprinkle crushed candy canes on top. Cover it tightly with plastic wrap.
Chill and Serve: Refrigerate the cake for at least 4 hours or overnight—this allows all those flavors to mingle together beautifully. When ready to serve, slice with a sharp knife and enjoy!
Now that you’ve made this dreamy Peppermint Icebox Cake, you’re officially ready to impress friends and family! It’s more than just dessert; it’s an experience filled with laughter and joy.
You Must Know About Peppermint Icebox Cake
- This showstopping Peppermint Icebox Cake delivers restaurant-quality results using simple ingredients you probably already have at home.
- The perfect balance of textures and flavors creates an unforgettable dining experience that will have everyone asking for seconds.
- Picture-perfect presentation with vibrant colors makes this dish absolutely Instagram-worthy and guaranteed to impress any dinner guest.
- Incredibly versatile recipe that works beautifully for weeknight dinners, meal prep, special occasions, or even outdoor entertaining sessions.
Perfecting the Cooking Process
For a seamless experience, start by whipping the cream until stiff peaks form. Then, mix in your peppermint extract before folding in crushed cookies. Assemble the layers in a baking dish, alternating between whipped cream and cookie layers for a beautiful presentation.
Add Your Touch
Feel free to swap out the peppermint extract with vanilla or almond for a different flavor twist. You can also add crushed candy canes or chocolate chips between layers for extra texture and sweetness, creating a delightful surprise in every bite.
Storing & Reheating
Store leftover Peppermint Icebox Cake in an airtight container in the fridge for up to five days. If you want to enjoy it later, simply let it sit at room temperature for about 10 minutes before serving to restore its creamy texture.
Chef's Helpful Tips for Peppermint Icebox Cake
- This professional-quality Peppermint Icebox Cake relies on precise timing and temperature control to achieve restaurant-standard results consistently.
- Master the art of mise en place by prepping all ingredients beforehand, ensuring smooth execution and preventing any last-minute cooking disasters.
- The secret lies in layering flavors throughout the cooking process rather than seasoning only at the end for maximum depth.
- Tip let the finished dish rest for optimal texture and flavor development before serving to hungry guests waiting eagerly.
The first time I made this cake, my friends insisted I was hiding a secret ingredient because it tasted so divine! Their reaction made me realize that cooking is as much about love as it is about technique.
FAQ
What is Peppermint Icebox Cake?
Peppermint Icebox Cake is a chilled dessert made by layering whipped cream with cookies and peppermint extract. It’s easy to assemble and requires no baking, making it perfect for warm weather gatherings or last-minute parties.
How long does Peppermint Icebox Cake need to chill?
To achieve optimal results, let your Peppermint Icebox Cake chill in the refrigerator for at least 4 hours or overnight if possible. This resting time allows the flavors to meld beautifully while softening the cookies into a delightful cake-like structure.
Can I make this cake gluten-free?
Absolutely! Simply swap traditional cookies with gluten-free alternatives like almond flour cookies or gluten-free graham crackers. The taste remains fantastic while accommodating those with dietary restrictions.
How can I decorate my Peppermint Icebox Cake?
Get creative! Top your cake with additional whipped cream, crushed candy canes, or chocolate shavings for added flair. Fresh mint leaves can also enhance both appearance and flavor while elevating your dessert’s wow factor!
Conclusion for Peppermint Icebox Cake
This delightful Peppermint Icebox Cake combines simplicity with elegance, making it a must-try dessert at any gathering. With just a few ingredients and minimal effort, you’ll create something that not only looks stunning but tastes divine as well. Remember to experiment with flavors and toppings to personalize your creation further! Enjoy every creamy bite that leaves everyone craving more.
Did You Enjoy Making This Recipe? Please rate this recipe with ⭐⭐⭐⭐⭐ or leave a comment.
📖 Recipe Card
Print
Peppermint Icebox Cake
- Total Time: 20 minutes
- Yield: Serves 12 1x
Description
Peppermint Icebox Cake is a festive, no-bake dessert that combines layers of creamy peppermint filling and crunchy chocolate wafer cookies. This delightful treat offers a refreshing burst of flavor that’s perfect for holiday gatherings, summer barbecues, or whenever you crave something sweet. With its stunning presentation and easy preparation, this cake is sure to impress your family and friends.
Ingredients
- 24 chocolate wafer cookies
- 2 cups heavy whipping cream
- 1 cup powdered sugar
- 1 tsp pure peppermint extract
- ½ cup crushed candy canes
Instructions
- Whip the heavy cream in a large bowl until soft peaks form.
- Gradually add powdered sugar and peppermint extract, continuing to beat until stiff peaks form.
- Dip each chocolate wafer cookie briefly in milk to soften, then layer them in a rectangular dish with whipped cream between layers.
- Once all layers are assembled, top with remaining whipped cream and sprinkle crushed candy canes. Cover tightly with plastic wrap.
- Refrigerate for at least 4 hours or overnight before serving.
- Prep Time: 20 minutes
- Cook Time: 0 minutes
- Category: Dessert
- Method: No-bake
- Cuisine: American
Nutrition
- Serving Size: 1 slice (100g)
- Calories: 290
- Sugar: 21g
- Sodium: 50mg
- Fat: 21g
- Saturated Fat: 12g
- Unsaturated Fat: 8g
- Trans Fat: 0g
- Carbohydrates: 25g
- Fiber: 1g
- Protein: 2g
- Cholesterol: 60mg


