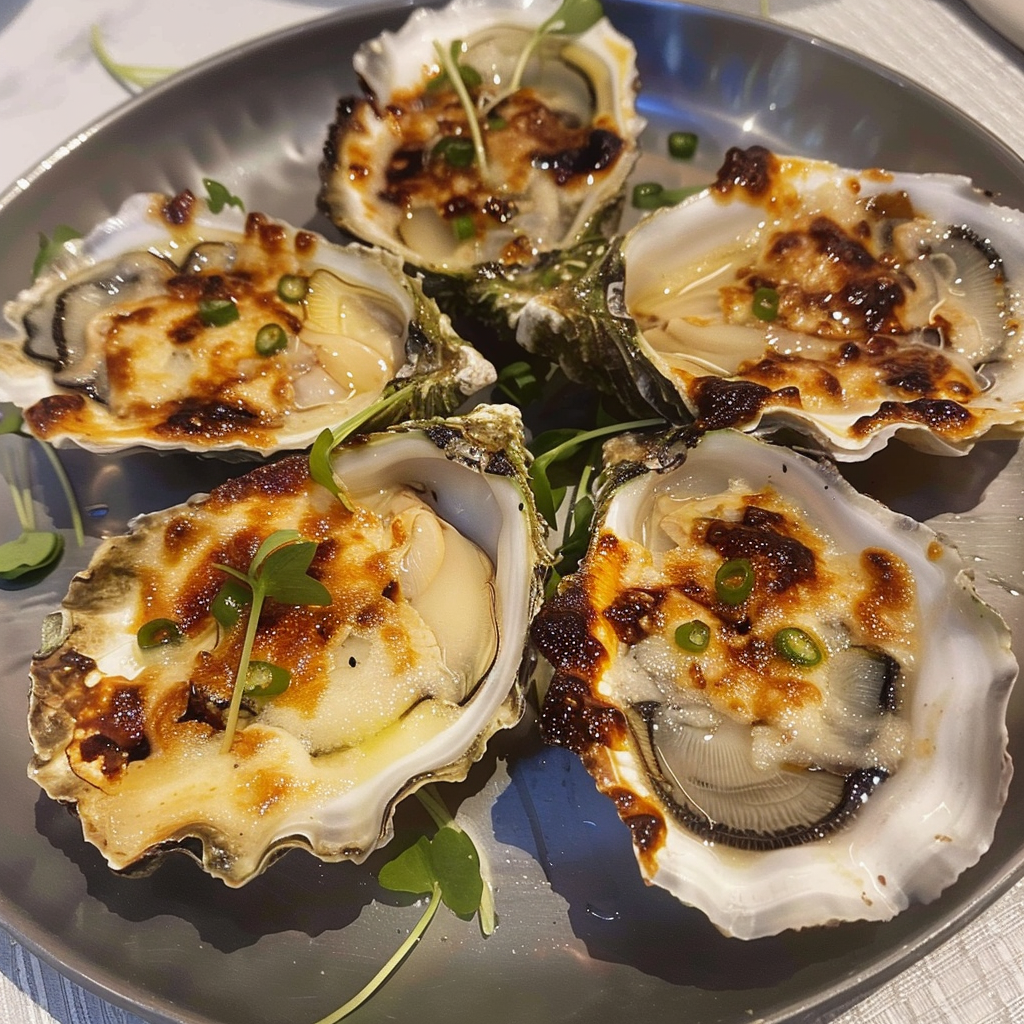
There’s something magical about broiled oysters. Picture this: succulent, briny morsels of ocean goodness, kissed by the heat until they are just tender enough to make you swoon. The aroma wafts through the air, inviting friends and family to gather around the table, their faces lit with anticipation. Trust me when I say that these delicious little gems are not just a dish; they are an experience that can transform any gathering into a memorable feast.

Jump to:
- <strong>Essential Ingredients</strong>
- <strong>How to Make Broiled Oysters</strong>
- <strong>Perfecting the Cooking Process</strong>
- <strong>Add Your Touch</strong>
- <strong>Storing & Reheating</strong>
- <strong>FAQ</strong>
- What type of oysters are best for broiling?
- Can I use frozen oysters for this recipe?
- How do I know when my broiled oysters are done?
- Can I make these ahead of time?
- <strong>Conclusion for Broiled Oysters</strong>
- 📖 Recipe Card
I remember the first time I tried broiled oysters. It was during a summer barbecue at my friend’s house, where laughter mingled with the scent of grilled meats and fresh herbs. Someone suggested we try these oysters, and let me tell you, it was love at first bite. Juicy, cheesy, and delightfully smoky — I was hooked! Since then, they have become my go-to dish for impressing guests or simply indulging myself on a cozy night in.
Why You'll Love This Broiled Oysters
- This incredible Broiled Oysters transforms simple everyday ingredients into restaurant-quality flavors that will blow your mind completely.
- Foolproof recipe techniques guarantee perfect results every single time, making even novice cooks feel like professional chefs instantly.
- Stunning visual appeal with gorgeous colors and mouthwatering aromas creates the ultimate Instagram-worthy dish for any special occasion.
- Endlessly adaptable for different dietary needs while working beautifully for meal prep, date nights, or entertaining large groups effortlessly.
I still chuckle thinking about how everyone fought over the last few oysters that day; they were gone faster than you could say “shuck.”
Essential Ingredients
Here’s what you’ll need to make this delicious dish:
- Fresh Oysters: Select plump oysters with tightly closed shells for optimal freshness—those are the real stars of this show.
- Butter: Use unsalted butter to control saltiness; it adds richness that will have your taste buds dancing.
- Garlic: Fresh minced garlic infuses an aromatic kick; it’s like a party for your nose before it hits your mouth.
- Parmesan Cheese: Grate fresh cheese for maximum flavor; don’t skimp on this—no one likes a dull oyster!
- Paprika: Whether smoked or sweet, paprika adds a lovely color and depth of flavor to your topping.
- Lemon Wedges: A squeeze of fresh lemon juice brightens every bite; it’s like sunshine on your palate!
The full ingredients list, including measurements, is provided in the recipe card directly below.
How to Make Broiled Oysters
Preheat Your Oven: Set your oven to broil on high (about 500°F/260°C). Line a baking sheet with aluminum foil for easy cleanup afterwards.
Shuck Those Oysters: Carefully open each oyster with an oyster knife by inserting it into the hinge and twisting gently. Discard any broken shells and reserve the bottom half of each shell for baking.
Make the Topping Mixture: In a bowl, combine softened butter, minced garlic, grated Parmesan cheese, and paprika. Mix until well combined, ensuring all those flavors meld together nicely.
Top Your Oysters: Place each shucked oyster on the prepared baking sheet and generously spoon the topping mixture over each one—don’t be shy!
Broil to Perfection: Slide the tray into your preheated oven and broil for about 5-7 minutes until the cheese is bubbly and golden brown. Keep an eye on them so they don’t burn!
Squeeze Lemon & Serve Hot: Remove from oven carefully (it’s hot!) and finish with a squeeze of fresh lemon juice over each oyster before serving. Enjoy immediately while they’re warm!
Now that you know how to create this culinary masterpiece at home, get ready for compliments and requests for seconds! Broiled oysters bring joy—not just because they’re delicious but also due to their fun preparation process that invites everyone in for a good time around the kitchen or dining table. Happy cooking!
You Must Know About Broiled Oysters
- This showstopping Broiled Oysters delivers restaurant-quality results using simple ingredients you probably already have at home.
- The perfect balance of textures and flavors creates an unforgettable dining experience that will have everyone asking for seconds.
- Picture-perfect presentation with vibrant colors makes this dish absolutely Instagram-worthy and guaranteed to impress any dinner guest.
- Incredibly versatile recipe that works beautifully for weeknight dinners, meal prep, special occasions, or even outdoor entertaining sessions.
Perfecting the Cooking Process
Start by preheating your broiler while you prepare the oysters. Arrange them on a baking sheet and mix your toppings in a bowl. Once mixed, spoon the mixture over each oyster, ensuring even coverage. Broil for about 5-7 minutes until the topping is golden and bubbly. Enjoy the delightful aroma filling your kitchen as these beauties cook!
Add Your Touch
Feel free to customize your broiled oysters with different toppings like garlic butter, breadcrumbs, or even a sprinkle of cheese. You can swap out parsley for chives or add a dash of hot sauce if you’re feeling adventurous. Experimenting with flavors is where the magic happens, so don’t hesitate to unleash your inner chef!
Storing & Reheating
Store leftover broiled oysters in an airtight container in the refrigerator for up to two days. When reheating, place them back under the broiler for just a couple of minutes to restore their crispiness. Avoid microwaving them; nobody wants soggy oysters!
Chef's Helpful Tips for Broiled Oysters
- This professional-quality Broiled Oysters relies on precise timing and temperature control to achieve restaurant-standard results consistently.
- Master the art of mise en place by prepping all ingredients beforehand, ensuring smooth execution and preventing any last-minute cooking disasters.
- The secret lies in layering flavors throughout the cooking process rather than seasoning only at the end for maximum depth.
- Tip let the finished dish rest for optimal texture and flavor development before serving to hungry guests waiting eagerly.
I remember hosting a small seafood-themed dinner party where I served these broiled oysters as a starter. Watching my friends’ eyes light up and hearing their delighted exclamations made every effort worthwhile.
FAQ
What type of oysters are best for broiling?
For broiling, choose larger varieties like Pacific or Eastern oysters since they hold up well during cooking and provide a satisfying bite. Their size also allows you to pile on delicious toppings without overwhelming them.
Can I use frozen oysters for this recipe?
While fresh oysters yield the best flavor and texture, frozen ones work in a pinch! Just make sure they’re thawed completely before you start preparing them for broiling to achieve consistent cooking results.
How do I know when my broiled oysters are done?
Broiled oysters are ready when their edges begin to curl slightly and the topping turns golden brown after about 5-7 minutes under high heat. Keep an eye on them; no one likes overcooked seafood!
Can I make these ahead of time?
You can prepare the topping in advance and store it separately in the fridge until you’re ready to assemble and broil the oysters. This saves time on busy nights while still delivering that fresh taste everyone loves.
Conclusion for Broiled Oysters
Broiled Oysters are not just easy; they’re a culinary adventure waiting to happen right in your kitchen! By mastering the cooking process, adding your personal touch with unique ingredients, and knowing how to store leftovers properly, you’ll impress family and friends alike with this delightful dish. So don’t wait—get those shells ready and dive into this tasty experience!
Did You Enjoy Making This Recipe? Please rate this recipe with ⭐⭐⭐⭐⭐ or leave a comment.
📖 Recipe Card
Print
Broiled Oysters
- Total Time: 22 minutes
- Yield: Serves 4 (3 oysters per serving) 1x
Description
Broiled oysters are a delightful seafood treat that brings the taste of the ocean right to your table. With their tender texture and rich, cheesy topping, they are perfect for impressing guests or enjoying a cozy night in. This recipe transforms simple ingredients into a gourmet dish that is both visually stunning and utterly delicious. Whether for a special occasion or a casual meal, broiled oysters are sure to be a hit!
Ingredients
- 12 fresh oysters
- 4 tbsp unsalted butter (softened)
- 3 cloves garlic (minced)
- 1/2 cup grated Parmesan cheese
- 1 tsp paprika
- Lemon wedges (for serving)
Instructions
- Preheat your oven's broiler to high (500°F/260°C) and line a baking sheet with aluminum foil.
- Carefully shuck the oysters, discarding broken shells and reserving the bottom halves.
- In a bowl, mix softened butter, minced garlic, grated Parmesan cheese, and paprika until well combined.
- Place each shucked oyster on the baking sheet and spoon the topping mixture generously over them.
- Broil for 5-7 minutes until bubbly and golden brown. Keep an eye on them to prevent burning.
- Remove from the oven and squeeze fresh lemon juice over each oyster before serving.
- Prep Time: 15 minutes
- Cook Time: 7 minutes
- Category: Appetizer
- Method: Broiling
- Cuisine: Seafood
Nutrition
- Serving Size: 3 oysters (approximately 120g)
- Calories: 280
- Sugar: 0g
- Sodium: 360mg
- Fat: 20g
- Saturated Fat: 10g
- Unsaturated Fat: 8g
- Trans Fat: 0g
- Carbohydrates: 4g
- Fiber: 0g
- Protein: 15g
- Cholesterol: 45mg


